There are a lot of plugins to integrate your WordPress website with your Social Networking Accounts but Jetpack by Automattic (same people who created WordPress) is the go-to choice for publicizing and sharing to Social Networks if you are looking for reliability and an easy to setup.
While Jetpack may not be as robust as other plugins that provide Social Network Integration It’s ideal if you want a no-hassle setup for Facebook, Twitter, LinkedIn, Tumblr, Path or Google+ publicizing with even more options for sharing.
For the purpose of this tutorial, our focus will be on Facebook integration/configuration because the process is similar, if not easier for the other supported Social Networks.
Let’s get started configuring the Jetpack Publicize module
To configure publicize you will need to do the following if you haven’t already:
- Install Jetpack plugin from the plugins “Add New” menu (WordPress Stand-Alone Installations) or Activate the plugin (WordPress.com). If you don’t know how to install or activate a WordPress plugin, talk to your webmaster or watch this video “How To Install and Configure Plugins.”
- Setup a WordPress.com account (needs to be done in order to connect Jetpack to WordPres.com)
- Be logged into your Social Network and WordPress.com

Once you have completed the first three steps, you can configure the Publicize Module.
Log into your WordPress Dashboard as an “Admin User”.
Hold your mouse over Jetpack on the left-hand side menu and select Settings from the popup menu.
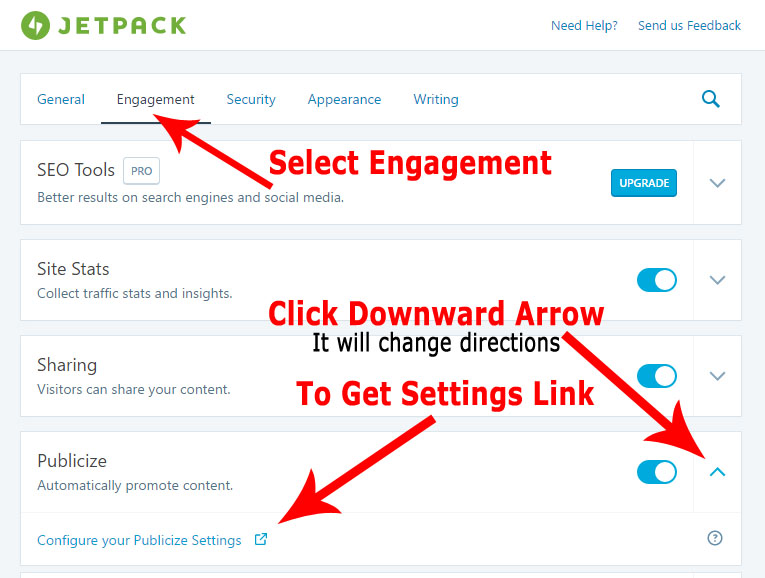
When the Jetpack Settings Page loads click on Engagement then. Check that the button slider is set to on ( the circle will be on the right side of the oval) then click the down arrow on the right side of the Publicize box. Next, locate and click on the “Configure your Publicize Settings” link on the left side of the publicize box.
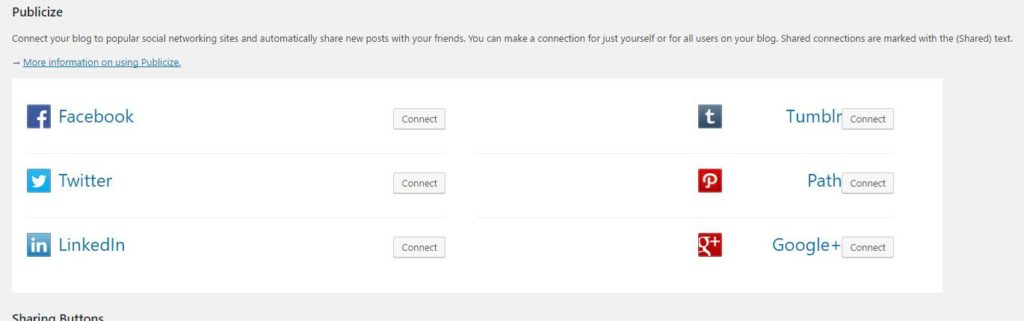
On the Sharing Settings Page, under Publicize, click the “Connect” button to the right of Facebook.
*Note on Publicizing to multiple Social Networks
It’s generally considered a bad idea to Publish the same content to multiple Social networks as many people may following you on more than one and your content would be redundant. This doesn’t mean you shouldn’t connect more than one Social Network because you can select which Social Networks your posts are submitted to before you publish your post.
When the
Share Your Two Cents